Showing posts with label let's get trendy now. Show all posts

Friday, June 28, 2013

Muse #23

Always one to leave things until the last minute...today, Friday, is the last day of school. The boys had 19 teachers & staff that they wanted to write thank you cards for (and that's doubling up on the ones they have in common, like administrators. 19 individual people). That pretty much cleaned out my thank you card stash, so the next few days will be seeing a number of thank you cards here on the ol' blog. Nothing like a few challenges to get the mojo going.

This card is going to the guidance counselor, who is well-loved by both boys. I was heavily inspired by the current Muse, Anita (in France), specifically by the use of rhinestones & sequins, pink & blue, and lots of white space. I also love the horizontal lines. And, since I pulled out sequins again, throwing my crafty hat in the ring over at Let's Get Trendy Now 3 as well.


Supplies: piercing tool & Tim Holtz design ruler; stamp from Lawn Fawn; Memento Gray Flannel ink; Martha Stewart pink rhinestones; sequins from Emily; Mod Podge Dimensional Magic


I didn't measure the distance between the pierced lines - I just lined up the ruler with the bottom edge, and then from each subsequent pierced line. The sequins stay on perfectly with a little toothpick dab of DM (I use the clean end of the toothpick to push the sequins flat onto the glue dab). This felt very outside my comfort zone but I like how it turned out!


The Muse challenge linky closes on Saturday, and the Let's Get Trendy challenges all end on Sunday. 

xoxo,
Jessi

ETA! Linking up with Muse, I see that they have changed their voting/submission deadlines. WOOT! The linky will now stay open until Monday mornings, and voting will start then. I think that's fabulous - I have a terrible time getting linked up on Saturday morning ;)

Thursday, June 27, 2013

Textured Krafty Layers

Another three-fer for you this morning - the current challenge at The Kraft Journal is to use ink, paint, or markers. I've used crackle paint, which is FULL of texture for the Textured Layers challenge at Let's Get Trendy Now 3; and Simon Says Stamp is having an anything goes week. 


Supplies: kraft card stock; misc. patterned paper; Antique Linen Distress crackle paint; Tonic edge distresser; Spellbinders butterfly die; Hero Arts sentiment stamp; Colorbox Frost White pigment ink; Stampendous White EP

I die cut the butterfly from kraft card stock before painting it with the crackle paint. It curled as it dried, but I was able to fiddle with it & get it back to shape by bending & flexing it. The edge distresser was used on the kraft layer after the smudges of paint dried. I used double-sided tape to adhere it to the white card base but left all the corners loose for extra dimension. The patterned paper flag panel was hand-cut, I tied the floss bow around it, and then attached it with foam tape. The butterfly is also adhered with foam tape. I was a little off plumb with my sentiment stamping (of course, my last touch before sticking it to the card) so I adapted that by adding the panel to the base at an angle. The sentiment is parallel with the card base. And it even looks like I did it on purpose! Woot!

xoxo,
Jessi

Let's get Mixy & Matchy with a Pink Elephant!

Inspired by Lyndal's awesome blog post this morning, fun with titles!  I got so inspired by the Let's Get Trendy Now 3 series that I went out and bought some neon stuff for the challenge. And then of course, I couldn't decide what to use out of what I'd bought.

The sketch this week at The Pink Elephant was perfect for including everything. (Seriously - well, not every colour of cardstock, but I opened every package.) And this has ended up mixing so many fun patterns that of course I've got to pop it in the Mixy-Matchy challenge at Moxie Fab World. 


Supplies: washi tapes & neon cardstock from Recollections; Wplus9 banner dies; Adirondack Citrus ink; Squeezed Lemonade distress ink; argyle stamp from Unity & thanks stamp from Lawn Fawn - both from the super awesome Jen Wills!; Stampendous motif stamp; 1.5" circle punch; rhinestones from Dollarama; sequins from the fabulous Emily Leiphart!


I used the ikat patterned washi to create a solid sheet of paper to work with. The three flag tabs were created the same way - putting the washi on cardstock first, and then die-cutting it. You can just barely see the yellow Stampendous image on the argyle panel. It didn't really work by itself, so I stamped the argyle over top (without conditioning the stamp first - it's brand-spanking-new, but I wanted that distressed effect). 

So, challenges:

Mixy-Matchy at Moxie Fab World:  there's ikat, argyle, animal print, and chevrons. Check!

Let's Get Trendy Now 3: Neon: neon orange, yellow, green, blue, and pink. Check! 

The Pink Elephant sketch:

And now I've completed all 5 of the Let's Get Trendy Now 3 challenges - but I'm also right into all those trends, so expect to see a couple more kicks at the can! 
xoxo,
Jessi

Wednesday, June 26, 2013

Textured Layers at Let's Get Trendy Now!

I really love cards that ask to be touched - like this one, with its crepe paper ruffles and shiny rhinestones. This card is for the Textured Layers challenge at Let's Get Trendy Now 3.


Supplies: stamps from Raisin Boat; paper from Amy Tangerine; Memento Tuxedo Black ink; Bic & Spectrum Noir markers; crepe paper & rhinestone strips from Dollarama; Sakura Stardust glitter pen 


The paisley pattern made me think of this stamp - one of my favourites :) 

Remember, you have until the end of June to play along with all of the Let's Get Trendy Now 3 challenges! I made my neon card this morning - still waiting for it to finish drying. And there are sequins on it! 

xoxo,
Jessi

Monday, June 24, 2013

Let's Get Trendy Now 3 - Stitching!

I'm slowly working my way through the 5 challenges for Let's Get Trendy Now 3 - including, for the first time ever, going to buy stuff BECAUSE of a challenge. I had really opted out of neon altogether, and well, look at that. I've been converted! Now to go play with it. All these challenges end when June does!

So today I've got a card with some stitching on it. I hand-stitch, and I really enjoy it. On cards only (no fabric stitching...there be dragons). One of my favourite ways to add stitching is to sew buttons in a frame, so I did that - and a little something extra:

Supplies: Stickers from Penny Black; papers from Bo Bunny; Mod Podge Dimensional Magic; Tim Holtz design ruler; piercing tool; needle & embroidery thread; buttons from stash


Hard to capture the shine, but the balloon is covered in a THICK layer of Dimensional Magic....there may or may not have been bad words said about how much poured out.

I used my handy dandy Tim Holtz design ruler to evenly pierce holes underneath one of the 'happy birthday's, and then stitched with bright yellow embroidery thread. Piercing the paper before you stitch is a huge factor in your success. Same thing with the buttons - I fiddle until I have the placement the way I want, then pierce for 2 or 3 buttons at a time. Without an 'anchor' of a sewn button, it is way too easy to pierce in the wrong places...and there may or may not have been bad words the day I figured THAT out. 

The link for the Stitching challenge at Let's Get Trendy Now 3 is here, and stay tuned for at least 2 more projects from me. Once I make them *koff*

xoxo,
Jessi

Sunday, June 16, 2013

Pattern mixing and Sequins!

I was stoked to see this month's Mixy-Matchy Style challenge at Moxie Fab World, because I love mixing & matching! And while I was at it, I decided to give some sequins a whirl, since not only are they featured at Let's Get Trendy Now 3, but I happened to get a little baggie of them in a bunch of crafty stuff from a friend. Lots of lace and ribbon, and way down at the bottom was a sandwich bags with beads & sequins. Score!
Supplies: papers from Amy Tangerine; washi tapes from We R Memory Keepers; sentiment stickers from Mrs. Grossman's


I used tiny dabs of Mod Podge Dimensional Magic (using a toothpick) to stick the sequins on. For the patterns, there's a mix of washi tape & paper smidges. I've ripped the edges of the paper to give a washi-edge appearance there as well, to draw them together. So, from the top:

yellow woodgrain - washi
pink stripe - paper
blue floral - washi on top of paper
blue houndstooth - washi
pink chevron - paper
yellow floral - washi

I had been planning to stamp the sentiment but then eyed up these stickers & thought the mix of fonts would totally suit the mix of colours & patterns.

There's lots of time left to play with both of these challenges - what have you got up your crafty sleeve?
Let's Get Trendy 3 - Sequins
Moxie Fab World - Mixy-Matchy Style

xoxo,
Jessi

Monday, June 10, 2013

For my Grandma!

My grandmother is turning 80 this summer - a huge milestone birthday. My mom asked me to make her birthday invitations (you'll see those tomorrow!) and to create an extra-special card for her to give. I am so thrilled with how it turned out:

Supplies: Memory Box dies; AC Thickers numbers; corsage pins (Michaels) and beads; Bazzill cardstock; Pearl Glimmer Mist (Tattered Angels); lace, seam binding, misc. gems; Cuttlebug embossing folder


When it was assembled, I misted it with 4 shots of Pearl Glimmer Mist - it adds just a touch of shimmer, and even if it gets a little 'blotchy' in spots it doesn't overwhelm the design. 


Beaded pins are all the rage, of course - but they aren't hard to make. These beads & end caps were left over from a Christmas ornament project I did a couple of years ago. 


The die cuts flowers with a gap between the 4th and 5th petals, so that you can create a bloom with dimension. I fold each petal roughly in half lengthwise, and then bend the end of the petal (you can see this really well on the pink & dark aqua flowers in the above pic). After all the mangling, dab some strong glue (Tombow mono works great) and join the petals together. Same thing with the centres - they are cut in a solid piece, but I bend up the edges, and glue them just by the very centre. 


A card like this is extremely heavy for paper - and of course you don't want to have pin ends and other bits showing on the inside. I've used very heavy card stock for my card base (I usually use 110 lb - this is easily  twice that thickness. Very stiff & hard to score - it needs to be weighted down overnight to hold the fold properly.) I have also created the design on a separate piece of card - cut just slightly smaller than the 5.5" base. The lace is wrapped around this & taped at the back. The pins are pushed through & the sharp ends secured at the back. Once I was completely finished with the design, I used strips of foam tape to secure the panel to the base - this gives space for the bulky items poking through to lay flat, and I find foam tape also helps to strengthen the entire card - you KNOW people leave these sorts of cards out on display for a while! You don't want them to fall over :)

AND, a card like this needs a box:


The ribbon is American Crafts, and the chipboard flourishes are from Fancy Pants (cut apart).

To create the box, I cut my usual card stock to 8.5" square. Score at 1" on every side, cut flaps, and assemble. For the base of the box, cut card stock to 8.25" square, score at 1" on each side. There's the perfect amount of room inside to add some tissue paper.

I didn't have a long enough piece of seam binding to tie the entire box, so I used a different ribbon, and tied the same 2 colours of seam binding around the bow to draw the box together with the card.

Have you subscribed to the latest Let's Get Trendy Now? They are always full of fabulous ideas for the latest trends - and this time is no exception! I cannot WAIT to play along with each challenge. This particular card is so very perfect for playing along with the Handmade Embellishments challenge - I've created the flowers & the pins :) And better yet? I've created a card that my grandmother is going to adore. Now how am I going to top this for the one from me.....hmmm..... :)

Speaking of my grandmother, I do have one more picture in this post for you - a picture of her & her family at about age 11. At the same age, I was her spitting image - to the point where people coming to the house would see it and ask if it was me, and where did we get it done!


My grandmother is standing behind shy girl in white :)

And in this photo, she's in red! Five generations in one photo - the baby is Connor, who's now 14, I'm holding him. There's my mom, and my grandmother, and my great-grandfather as well. 

OK! Enough pictures for one day :) You know  there will be more!
Thanks so much for letting me share with all of you!
xoxo,
Jessi

Thursday, October 11, 2012

Let's Get on Leafy Wheels :)

A couple of cards and 3 challenges for you tonight - I was hoping to get all 5 categories finished for Let's Get Trendy Now 2, but it's just not going to happen! I did get 2 more done, though, and stretched myself creatively, so I consider that a plus :)

First up I'll show you my VERY BRIGHT card using stencils - and also interpreting this week's cue card at CASology:

Supplies: Hero Arts ginkgo leaf; Stampendous sentiment;
Market Street Stamps burlap;
Distress inks: Mowed Lawn, Squeezed Lemonade, Mustard Seed

An ancient stencil with baby-themed designs.
I'm pretty sure I've used this ginkgo leaf for a CASology card before, but it really lends itself to a more CAS design. I taped the stencil down onto a large piece of white cardstock, and sponged the Squeezed Lemonade distress ink over the stencil. Then I inked the burlap stamp with the same ink & pressed down, and then followed up with the ginkgo stamp. And, because my yellow was still wet, the green bled a bit & the detail of the stamp was smudged...and I got up & went to Zumba, cursing under my breath. 

Today when I came back prepared to toss it in the recycling, I realized I could salvage it by paper-piecing the main part of the leaf. Huzzah! I also noticed that overnight the burlap texture wasn't visible, so before adhering the paper-pieced leaf I restamped the burlap with the darker yellow. Of course, I didn't have the stencil on any longer, so it went over the edges, but at this point I was going with it. I held my breath & stamped the sentiment, and then trimmed the panel down to the size I wanted, inking the edges directly with the same green ink. 

So, note to self - give the ink lots of time to dry, mmmmkay?

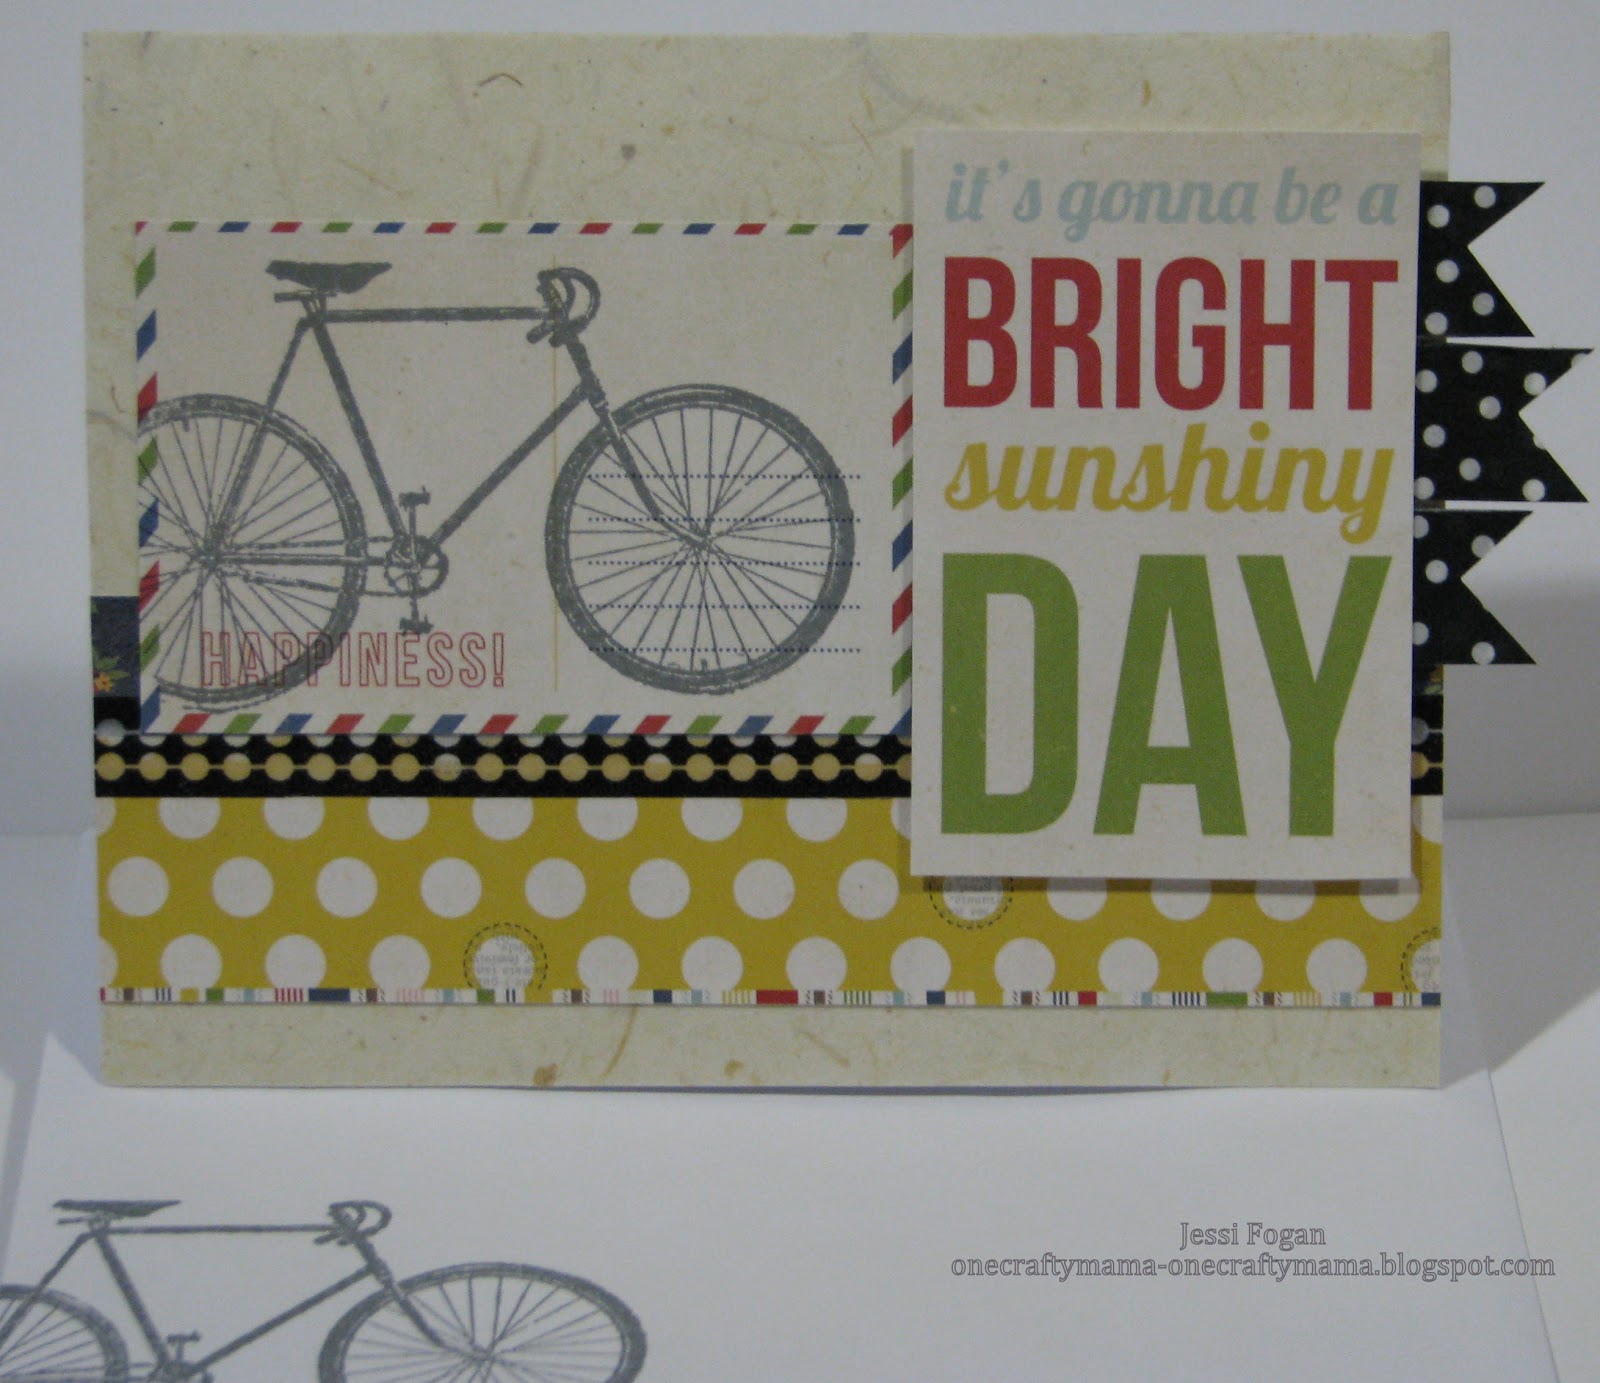
Now, for my second card, I was also inspired to pull out a bicycle stamp for this week's DYSU challenge, WHEELS! 

And for Let's Get Trendy Now 2, I knew I wanted to use washi tape...but how?
Supplies: bike stamp from Recollections;
papers & clip art from Simple Stories "summer fresh;"
Memento Gray Flannel ink;
washi tape from K & Co and We R Memory Keepers
(Sort of a side note - the background on this card? That lovely handmade-looking paper? It's Poo Paper. I love that stuff!)
OK, so I wanted to do something a little bit different that just sticking the washi onto my card. I did use a little bit that way (the black layer just below the bike image), but what else? What about washi flags, sort of like ribbon tabs? Please forgive the horribly blurry photos, but I think they're clear enough to  get the gist of it:

Pick your washi tape!

Fold the end, and tear off, leaving a generous sticky bit.

Use a square punch to 'notch' the FOLDED end.

Use the bit of sticky to adhere it to the back
of your panel!
I felt like a genius - it seemed silly to use extra adhesive to get the flags to stay on there, you know? ANYway.

*crickets chirping, me patting myself on the back*

Let's Get Trendy Now 2's deadline is October 12, and CASology's is Sunday the 14th, and DYSU's is Tuesday the 16th. So that makes me early for 2/3, and for me, that's not bad ;)

xoxo,
Jessi


Sunday, October 7, 2012

Let's Get Trendy Now #2 - Punches/die cuts

I'm late to the party this time BUT could not miss out on the awesomeness that is Let's Get Trendy Now #2 - I had a blast with #1, and have my fingers crossed for #3 and beyond :) Here's my first project, using punches:
Supplies: papers from Memory Box;
stamps from Annabelle Stamps;
butterfly & flower punch from Martha Stewart;
circle punch from EK Success;
Worn Lipstick, Vintage Photo, Antique Linen distress inks;
Liquid Pearls;
scrap of twine

I sponged the edges of the 2 butterfly punches, and wrapped the twine around to form the body/antennae.

A peek at the dimension - the flower petals are gently bent up & the flowers
adhered only in the centre. The sentiment is popped up on foam tape.
The top butterfly's wings are bent up around the twine. 
So here's the thing - I don't buy a lot of punches. They're expensive. I don't buy a lot of dies either, for the same reason. When I do purchase them, I choose ones that are very classic, versatile, and basic. I do tend to use my dies more often, so I personally pushed myself to use all punches on this card. And, all of these punches have been in my stash for over 2 years - so far they're standing the test of time :)

Quite a few fun things to share coming up today - in spite of my Man Cold, I'm soldiering on while the medication lasts ;)
xoxo,
Jessi